One of the things that we all ignore many times (I confess that I have ignored it until now), is the EEPROM memory of our Arduino. This memory is not very large, but it has the advantage that it survives the shutdowns of our microcontroller. That is why in this article I will teach you how to read and write persistent data in the Arduino EEPROM.
This metod is also compatible with other AVR chips like for example the ATTiny family like ATTiny85 and ATTiny45, and also is compatible with other like ESP8266.
The first two notes in relation to this memory:
- The size of this memory is 1 kilobyte for atmega328
- Every byte has about 100,000 write cycles
So we will have to be careful not to write every minute on it and we will have only 1k. If we write for example 10 times a day we will have memory for 27 years, which is enough.
My recommendation is that every time you write, read to verify. If it does not match, you can manage it by lighting a LED or changing the memory address. An example would be to have a control of writing of data, and in the case that it changes to move it to another position in the memory. You can even have an index in the purest HDD style, in which you save the memory location where you save the data.
Well, ending with the introduction that will surely bore the sheep: P, I will continue explaining the functions we have.
EEPROM Write
The first function that we will take into account will be that of writing, of course. This function allows us to write bytes in the EEPROM and its operation is very easy.
EEPROM.write(addr, val);
Where we will indicate the address where we will write (addr), and the byte to write (0 to 255). It is recommended not to use this method unless the writing time is very important, since we have other methods such as update, which before verifies if it has changed.
More information about it on the arduino website: https://www.arduino.cc/en/Tutorial/EEPROMWrite
EEPROM Read
Another function to consider is that of data recovery of course. For this we will use the EEPROM.read function, which will allow us to read bytes from EEPROM memory.
int value = EEPROM.read(addr);
As with the write function, we will have to indicate the address to read (addr), and the data will be saved in the variable value. This function does not damage the memory, so we can use it as many times as we want safely.
More information about it on the arduino website: https://www.arduino.cc/en/Tutorial/EEPROMRead
EEPROM length
This function does not have much mystery and what it does is return us the length of EEPROM memory. It can help us to have control over memory size, which can help us adjust our program to different types of microcontroller.
unsigned int size = EEPROM.length();
EEPROM Update
Its operation is the same as that of the EEPROM.write function, with the difference that it first performs a read operation to confirm if it has changed. In case the values match, this function will not write on the block, so we will save on write operations.
EEPROM.update(addr, val);
More information about it on the arduino website:
https://www.arduino.cc/en/Tutorial/EEPROMUpdate
EEPROM Put
And we start with the interesting functions. This function allows us to save any variable type in EEPROM memory, so we won’t have to worry about splitting them in bytes. In addition we can also save custom variables type struct.
The main advantage (or disadvantage as you look at it) is that this function uses EEPROM.update to save the data, so it helps preserve the EEPROM if there are no changes.
EEPROM.put(addr, val);
Its use is like Write or Update, so we will have to indicate the address where we will write and what value to save.
More information about it on the arduino website:
https://www.arduino.cc/en/Tutorial/EEPROMPut
EEPROM get
This function is complementary to EEPROM.put, so it will allow us to recover the saved data regardless of the type.
The function uses the type of the variable that you indicate, so you must first create a variable to save the data.
float val = 0.00f;
EEPROM.get( eeAddress, f );
This function is safe as is EEPROM.read, since the reading operations do not wear down the memory of our microcontroller.
More information about it on the arduino website:
https://www.arduino.cc/en/Tutorial/EEPROMGet
Ejemplo de uso
I couldn’t finish without setting an example of how to use it, since I don’t know about you, but I often understand things better with one.
#include <EEPROM.h> // Incluimos la librería para poder usarla

// Creamos un tipo de objeto personalizado
struct customObj{
  float field1;
  byte field2;
  char name[10];
};

void setup(){
  float f = 0.00f;   // Variable to store data read from EEPROM.
  int eeAddress = 0; // Dirección EEPROM donde leer/Escribir

  Serial.begin(9600);

  // Datos a guardar.
  customObj customVarW = {
    3.14f,
    65,
    "Working!"
  };

  // Escribiendo datos
  EEPROM.put(eeAddress, customVarW);
  Serial.print("¡Datos escritos!");

  // Recuperamos los datos
  customObj customVarR;
  EEPROM.get(eeAddress, customVarR);

  // Mostramos los datos leídos, los cuales deben coincidir
  Serial.println("Leído objeto personalizado desde la EEPROM: ");
  Serial.println(customVarR.field1);
  Serial.println(customVarR.field2);
  Serial.println(customVarR.name);
}

void loop(){ /* Empty loop */ }
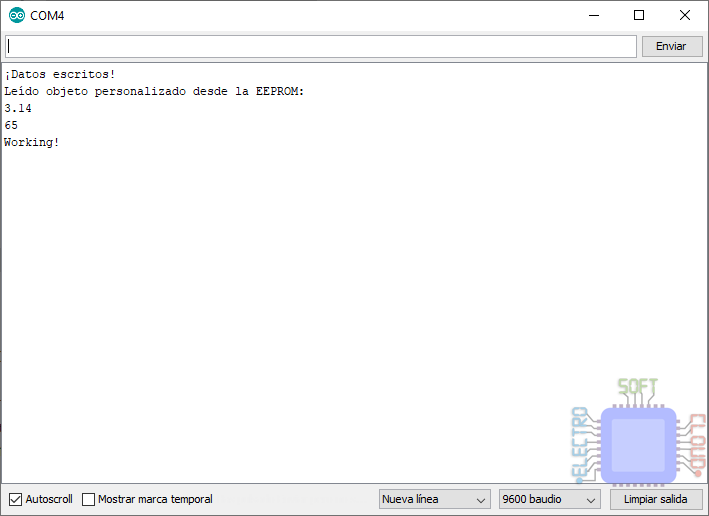
What gives us as a result:

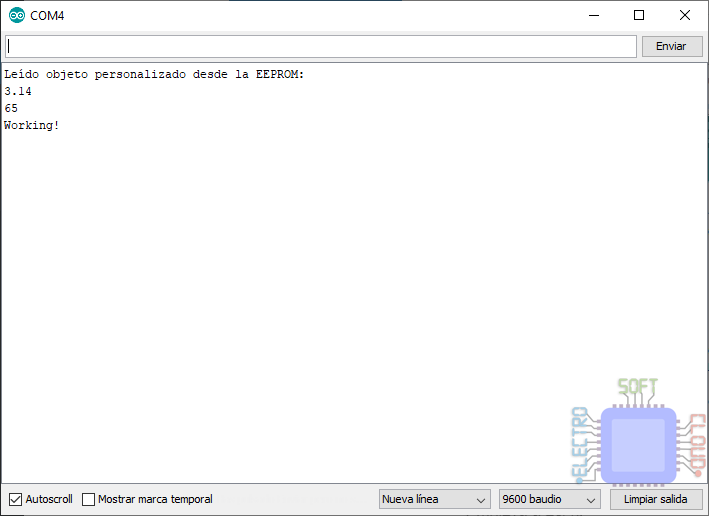
If we proceed to delete the code that writes the data in the EEPROM to verify its operation, we can observe how the data is still there.

I hope this guide on how to read and write data to the Arduino EEPROM has helped you.
As always, I hope it has helped you and greetings!

