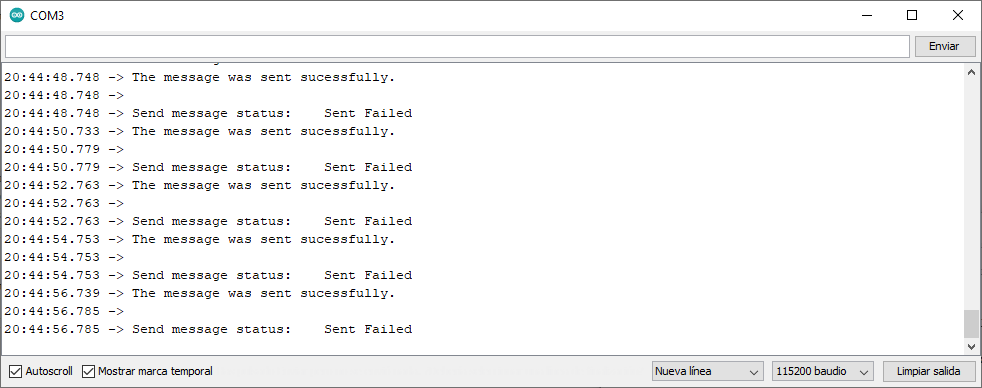
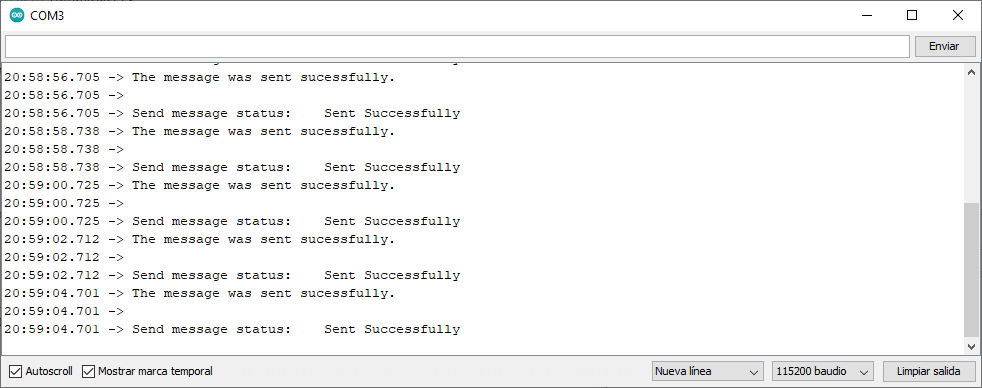
If, like me, you have just started working with the ESP-Now WiFi protocol, surely you have used the basic example to test. This example will surely be similar to the one I discussed in my basic ESP-Now guide. If, after having started the ESP-Now communication, you have found that you wanted to use the WiFi and ESP-Now simultaneously, surely you have failed. When connecting the WiFi most of the ESP-Now packets are lost or do not arrive at all. This seems to be related to the way the WiFi works, so in this guide I will show you how to fix it.
Let’s start with the basic example of WiFi and ESP-Now, which we already know does not work.
Non-functional Master and ESP-Now
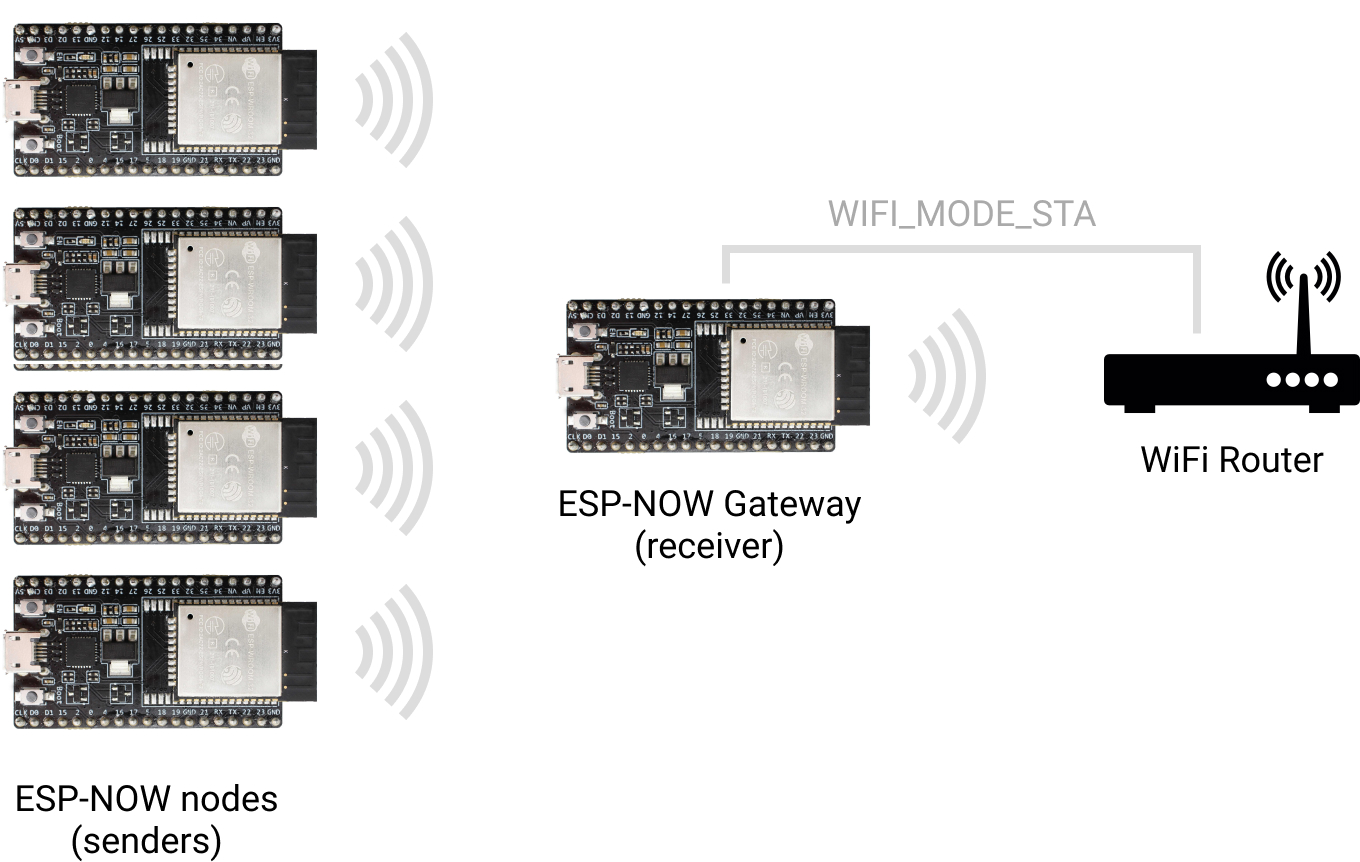
I have stressed the non-functional, so that later you do not say that I did not warn you or that it does not work. This example is what we would use if we mixed a standard WiFi connection with the ESP-Now protocol example, which would give us packet loss. The master is the node that will send the ESP-Now data to the slave, which will be the one that will be in charge of connecting to the WiFi to do whatever we want with them. This node will not connect to the WiFi, so we will only use it to send.
/*
  Daniel Carrasco
  This and more tutorials at https://www.electrosoftcloud.com/
*/

#include <esp_now.h>
#include <WiFi.h>
// Set the SLAVE MAC Address
uint8_t slaveAddress[] = {0xFF, 0xFF, 0xFF, 0xFF, 0xFF, 0xFF};
// Structure to keep the temperature and humidity data from a DHT sensor
typedef struct temp_humidity {
  float temperature;
  float humidity;
};
// Create a struct_message called myData
temp_humidity dhtData;
// Callback to have a track of sent messages
void OnSent(const uint8_t *mac_addr, esp_now_send_status_t status) {
  Serial.print("\r\nSend message status:\t");
  Serial.println(status == ESP_NOW_SEND_SUCCESS ? "Sent Successfully" : "Sent Failed");
}

void setup() {
  // Init Serial Monitor
  Serial.begin(115200);

  // Set device as a Wi-Fi Station
  WiFi.mode(WIFI_STA);
  // Init ESP-NOW
  if (esp_now_init() != ESP_OK) {
    Serial.println("There was an error initializing ESP-NOW");
    return;
  }
  // We will register the callback function to respond to the event
  esp_now_register_send_cb(OnSent);

  // Register the slave
  esp_now_peer_info_t slaveInfo;
  memcpy(slaveInfo.peer_addr, slaveAddress, 6);
  slaveInfo.channel = 0;
  slaveInfo.encrypt = false;

  // Add slave
  if (esp_now_add_peer(&slaveInfo) != ESP_OK){
    Serial.println("There was an error registering the slave");
    return;
  }
}
void loop() {
  // Set values to send
  // To simplify the code, we will just set two floats and I'll send it
  dhtData.temperature = 12.5;
  dhtData.humidity = 58.9;
  // Is time to send the messsage via ESP-NOW
  esp_err_t result = esp_now_send(slaveAddress, (uint8_t *) &dhtData, sizeof(dhtData));

  if (result == ESP_OK) {
    Serial.println("The message was sent sucessfully.");
  }
  else {
    Serial.println("There was an error sending the message.");
  }
  delay(2000);
}
Non-functional slave
Above we have seen the basic sketch of an ESP-Now master that will be the one that collects the data and sends it to the slave for example. The slave will be the node that connects to the WiFi to be able to send the data over the internet and other tasks that we want. It is in this node where we will find the problem that the packets do not arrive and therefore we lose the data. The example sketch is as follows:
/*
  Daniel Carrasco
  This and more tutorials at https://www.electrosoftcloud.com/
*/

#include <esp_now.h>
#include <WiFi.h>

static const char* ssid     = "WIFI_SSID";
static const char* password = "WIFI_PASSWORD";

// Structure to keep the temperature and humidity data
// Is also required in the client to be able to save the data directly
typedef struct temp_humidity {
  float temperature;
  float humidity;
};

// Create a struct_message called myData
temp_humidity dhtData;
// callback function executed when data is received
void OnRecv(const uint8_t * mac, const uint8_t *incomingData, int len) {
  memcpy(&dhtData, incomingData, sizeof(dhtData));
  Serial.print("Bytes received: ");
  Serial.println(len);
  Serial.print("Temperature: ");
  Serial.println(dhtData.temperature);
  Serial.print("Humidity: ");
  Serial.println(dhtData.humidity);
}
void setup() {
  // Initialize Serial Monitor
  Serial.begin(115200);

  // Set device as a Wi-Fi Station
  WiFi.mode(WIFI_STA);

  WiFi.begin(ssid, password);

  //check wi-fi is connected to wi-fi network
  while (WiFi.status() != WL_CONNECTED) {
    delay(1000);
    Serial.print(".");
  }

  // Init ESP-NOW
  if (esp_now_init() != ESP_OK) {
    Serial.println("There was an error initializing ESP-NOW");
    return;
  }

  // Once the ESP-Now protocol is initialized, we will register the callback function
  // to be able to react when a package arrives in near to real time without pooling every loop.
  esp_now_register_recv_cb(OnRecv);
}
void loop() {
}
Resultado
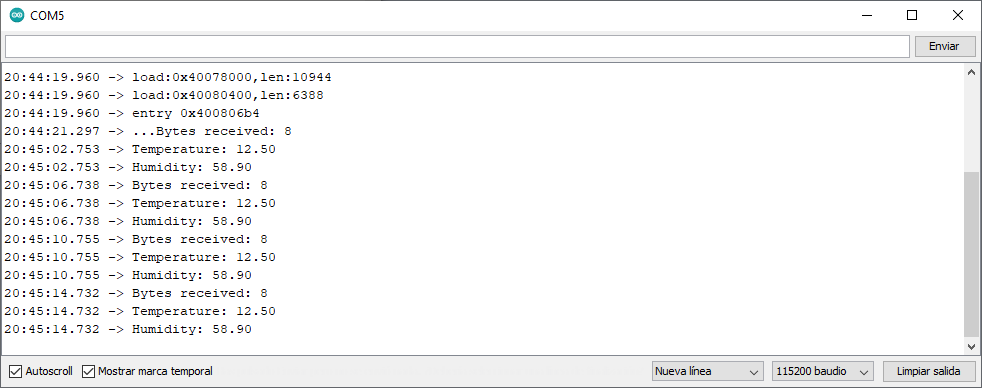
If you tried the examples above, you may have observed that the packets do not arrive from the ESP-Now master to the slave once you connect the WiFi, and if you comment the line WiFi.begin() the error disappears.

Some packets can arrive at random, like the ones in this screenshot below in which after a lot of attempts by the master, 4 packets have reached the slave.

If your application is not critical you may not mind retrying until it arrives, but personally it seems to me to make a lot of noise and little nuts. Plus I personally see it as an ugly patch and it’s not the right thing to do.
Easy WiFi and ESP-Now solution
Despite how difficult it has been for me to find the solution, browsing forums with examples that did not work, people saying that you had to use two boards, one for the WiFi and the other for the ESP-Now connected by the serial port .. and it turns out that the solution is the easiest.
The main problem seems to be caused by the station mode WiFi going into sleep mode while you have no work. This means that it does not listen to receive ESP-Now packets and therefore they are lost. To solve this we will have to force our microcontroller to listen continuously, and this is achieved by turning it into an AP (Access Point). Relax, it will not be necessary to expose the microcontroller, just tell it to configure itself as AP and Station at the same time. For this we will change this line:
WiFi.mode(WIFI_STA);
For this one:
WiFi.mode(WIFI_AP_STA);
With what the final code would be like this:
/*
  Daniel Carrasco
  This and more tutorials at https://www.electrosoftcloud.com/
*/

#include <esp_now.h>
#include <WiFi.h>

static const char* ssid     = "WIFI_SSID";
static const char* password = "WIFI_PASSWORD";

// Structure to keep the temperature and humidity data
// Is also required in the client to be able to save the data directly
typedef struct temp_humidity {
  float temperature;
  float humidity;
};

// Create a struct_message called myData
temp_humidity dhtData;
// callback function executed when data is received
void OnRecv(const uint8_t * mac, const uint8_t *incomingData, int len) {
  memcpy(&dhtData, incomingData, sizeof(dhtData));
  Serial.print("Bytes received: ");
  Serial.println(len);
  Serial.print("Temperature: ");
  Serial.println(dhtData.temperature);
  Serial.print("Humidity: ");
  Serial.println(dhtData.humidity);
}
void setup() {
  // Initialize Serial Monitor
  Serial.begin(115200);

  // Set device as a Wi-Fi Station
  WiFi.mode(WIFI_STA);

  WiFi.begin(ssid, password);

  //check wi-fi is connected to wi-fi network
  while (WiFi.status() != WL_CONNECTED) {
    delay(1000);
    Serial.print(".");
  }

  // Init ESP-NOW
  if (esp_now_init() != ESP_OK) {
    Serial.println("There was an error initializing ESP-NOW");
    return;
  }

  // Once the ESP-Now protocol is initialized, we will register the callback function
  // to be able to react when a package arrives in near to real time without pooling every loop.
  esp_now_register_recv_cb(OnRecv);
}
void loop() {
}
And with this simple change, you solve a problem that seems to have turned many on the internet. I’m not saying that people are very clumsy, maybe when they tried it it failed or it was not implemented. That is why I bring you this easy way in the hope that it will serve many.

Hard Way
If the option above failed you, there is an alternative option which is to put the WiFi channel on the master, which seems to be also a requirement for it to work. In my case without going any further, at the time of publishing the first part of this guide it worked perfectly for me, but when I went to implement it two days later in my project it began to fail. Perhaps it was a channel change by my router or similar, so I decided to expand this guide with the other option that I had seen.
Don’t be scared by the title, the “hard way” is because you have to add a few more lines, but it’s not really difficult. The lines to add are the header to be able to configure the channel and the line in which the channel is indicated.
... // Another headers and stuff
#include <esp_wifi.h>
... // The rest of stuff

setup() {
  ... // More of your code
  int32_t channel = 11;
  esp_wifi_set_channel(channel, WIFI_SECOND_CHAN_NONE);
  ... // Rest of your setup code
}

// The rest of code
After these adjustments it should work for you, but if in your case you do not know the channel or it happens to you like it is automatic, it may be better for you to detect the channel of your router automatically. For this you can use this code:
int32_t getWiFiChannel(const char *ssid) {
  if (int32_t n = WiFi.scanNetworks()) {
      for (uint8_t i=0; i<n; i++) {
          if (!strcmp(ssid, WiFi.SSID(i).c_str())) {
              return WiFi.channel(i);
          }
      }
  }
  return 0;
}
Which passing the SSID of your router returns the current channel. Thanks to RandomNerdTutorials who helped me with this last solution.
With both changes the final code would look like this:
/*
  Daniel Carrasco
  This and more tutorials at https://www.electrosoftcloud.com/
*/

#include <esp_now.h>
#include <esp_wifi.h>
#include <WiFi.h>

// Set the SLAVE MAC Address
uint8_t slaveAddress[] = {0xFF, 0xFF, 0xFF, 0xFF, 0xFF, 0xFF};

// Insert your SSID
constexpr char WIFI_SSID[] = "YOUR_WIFI_SSID";

// Structure to keep the temperature and humidity data from a DHT sensor
typedef struct temp_humidity {
  float temperature;
  float humidity;
};

// Create a struct_message called myData
temp_humidity dhtData;
// Callback to have a track of sent messages
void OnSent(const uint8_t *mac_addr, esp_now_send_status_t status) {
  Serial.print("\r\nSend message status:\t");
  Serial.println(status == ESP_NOW_SEND_SUCCESS ? "Sent Successfully" : "Sent Failed");
}

int32_t getWiFiChannel(const char *ssid) {
  if (int32_t n = WiFi.scanNetworks()) {
      for (uint8_t i=0; i<n; i++) {
          if (!strcmp(ssid, WiFi.SSID(i).c_str())) {
              return WiFi.channel(i);
          }
      }
  }
  return 0;
}

void setup() {
  // Init Serial Monitor
  Serial.begin(115200);

  // Set device as a Wi-Fi Station
  WiFi.mode(WIFI_STA);

  int32_t channel = getWiFiChannel(WIFI_SSID);
  esp_wifi_set_channel(channel, WIFI_SECOND_CHAN_NONE);

  // Init ESP-NOW
  if (esp_now_init() != ESP_OK) {
    Serial.println("There was an error initializing ESP-NOW");
    return;
  }
  // We will register the callback function to respond to the event
  esp_now_register_send_cb(OnSent);

  // Register the slave
  esp_now_peer_info_t slaveInfo;
  memcpy(slaveInfo.peer_addr, slaveAddress, 6);
  slaveInfo.channel = 0;
  slaveInfo.encrypt = false;

  // Add slave
  if (esp_now_add_peer(&slaveInfo) != ESP_OK){
    Serial.println("There was an error registering the slave");
    return;
  }
}

void loop() {
  // Set values to send
  // To simplify the code, we will just set two floats and I'll send it
  dhtData.temperature = 12.5;
  dhtData.humidity = 58.9;
  // Is time to send the messsage via ESP-NOW
  esp_err_t result = esp_now_send(slaveAddress, (uint8_t *) &dhtData, sizeof(dhtData));

  if (result == ESP_OK) {
    Serial.println("The message was sent sucessfully.");
  }
  else {
    Serial.println("There was an error sending the message.");
  }
  delay(2000);
}
With these changes you should already have a perfect and trouble-free WiFi and ESP-Now communication.
As always, I hope you liked it and it will serve you, and do not hesitate to comment or share. All the best!.


Thank you for your teaching, it solved a problem that has troubled me for a long time.
Thanks for putting this article together. I found an alternate solution to requiring STA_AP mode to keep the radio to be always listening. I did this instead and it appears to be working well without dropped packets.
#ifdef ESP8266
WiFi.setSleepMode(WIFI_NONE_SLEEP);
#else
WiFi.setSleep(false);
#endif
I was able to achieve bi-directional communication on both ESP8266 and ESP32 and was also able to have the ESP8266 communicate directly to ESP32 via ESP-NOW.
Nice!, thank you very much. I’ll take a look to it because is always good to learn new things.
Hi and thanks for the link – You saved my day really – Imagine what that line could do : esp_wifi_set_ps(WIFI_PS_NONE);
After oceans of coffe and swearing -.- The solution in one line Thanks
Also many thanks to Daniel for this article
Thanks for this. I tried it but I can’t get it to work. I’m trying to send from an ESP8266 to an ESP32 using ESPNow. The ESP32 is also using WiFi to upload the data from the ESP8266. But the ESP8266 gets a send error of -3, though I haven’t found what this means yet.
Hello,
I am in a new project and I am a bit busy (that is why the page was not updated from a while), but I’ll try to update the guide with some of your comments and I’ll test your situation too while I do it.
Best regards
Hey Daniel, first of all, thank you for the tutorial. One thing I do not quite understand. You say the line WiFi.mode(WIFI_STA); should be changed to WiFi.mode(WIFI_AP_STA);. However, it is not anywhere in your code. Did you forget it in the code?
Hi Daniel,
I have been working on a ESPnow Mesh system using ESP8266 and it all works very well. The system you have described above all works, but is very limited and not bidirectional. I am trying to get commands from the internet which need to be delivered to remote nodes, and also deliver sensor info to the internet via the “slave” unit. As soon as I enable the wifi with Wifi.begin the mesh system fails between that node and the remotes, but all remotes still talk to each other perfectly. I used the getchannel function to set all nodes to my router channel but still no success. if i remove remote nodes so that only 1 remains, then it all works but not reliable and when adding second remote node the link to the “slave” fails completely. The remotes still receive the data from the “slave” but reports failure at the “slave” node. No data arrives at the “slave” node from the remotes unless there is only 1 remote node, and even then it’s not reliable. All nodes are AP_STA mode and all peers added as COMBO.
If you have any suggestions I would be happy to listen to them. I am happy to share my Mesh code.
Regards
Bill
Thank you SOOOOOOO much!!! I have spent (wasted) a pile of time on this one. And such a a simple solution. All I can say is wow. I have multiple ESP gadgets chattering away and all now works.
hi is this applicable to esp8266 ?
thanks
thank you for this interesting article, but I did not understand what is to put the automatic channel selection on the master .. if this does not see the network on which the slave connects ….. if the master is out of range of the wifi network on where the slave connects to the router … thanks
Hello, I have answered to the other comment 😉
I’ll take a look into the code when I can yo try to make a better version. I was just learning and some things can be improved, but I had to leave it because lately I am a bit busy.
Congratulations on the clear and comprehensive explanation of the topics, but I have a question.
One of the positive sides of NOW is that it does not have to access the local network to transmit, so even if it is out of range of the router that creates the network, it still transmits to the Slave (Knowing MAC address).
the need to insert or discover the WiFi channel on the master nullifies this possibility or am I wrong?
You are right… This code is very simple and maybe if the WiFi is not in range it will fail (I was just learning how to use it). You can implement a code to check the WiFi channel and if fails use an automatic channel. Anyway, I have to test the guido link because maybe there is a better way.
thanks for this article, it helped me get to the right solution
but, there is an easier solution, use “esp_wifi_set_ps(WIFI_PS_NONE);” to disable modem sleep
see https://docs.espressif.com/projects/esp-idf/en/latest/esp32/api-guides/wifi.html#station-sleep
Thanks for the link, interesting… I’ll take a look to it as soon I can (lately i’m a bit busy), and I’ll update the guide.