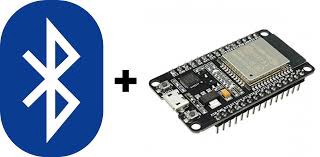
You have most likely chosen this microcontroller for its connectivity options. These include Bluetooth connectivity, and in this post we are going to learn the basics about how to use it.
First of all, to have everything unified and not complicate myself, I use the Arduino IDE, although sometimes I write libraries in Visual Studio Code, I always end up compiling in the Arduino IDE for convenience. If you don’t know how to install this board in the Arduino IDE, I recommend you go through this post.
Currently the ESP32 module has a Bluetooth 4.2 module with BLE (Bluetooth Low Energy). This will allow us to connect the device while maintaining low power consumption. This topic is extensive, so I will discuss it in another post to which I recommend that you be attentive, since I will teach how to add authentication.
Host mode (Serial Bluetooth)
The first thing we will learn is how to configure our ESP32 in host mode in serial mode to receive and send data. This will allow us to connect from other devices and control the operation of this microcontroller, or simply send data.
To do this, we will use this example in which we activate an LED connected to the microcontroller remotely through the mobile. In my case I had to use an external LED because the card’s LED is connected to the serial pin, and since we are going to use this communication, it does not work correctly.
/*
  Program to control LED (ON/OFF) from ESP32 using Serial Bluetooth
  by Daniel Carrasco -> https://www.electrosoftcloud.com/
*/
#include "BluetoothSerial.h" // We will include the Serial Bluetooth header

#if !defined(CONFIG_BT_ENABLED) || !defined(CONFIG_BLUEDROID_ENABLED)
#error Bluetooth is not enabled! Please run `make menuconfig` to and enable it
#endif

#define LED 23
BluetoothSerial BT; // Bluetooth Object

void setup() {
  Serial.begin(9600); // Initializing serial connection for debugging
  BT.begin("ESP32_LED_Control"); // Name of your Bluetooth Device and in slave mode
  Serial.println("Bluetooth Device is Ready to Pair");

  pinMode (LED, OUTPUT); // Change the LED pin to OUTPUT
}

void loop() {
  if (BT.available()) // Check if we receive anything from Bluetooth
  {
    int incoming = BT.read(); // Read what we recevive
    Serial.print("Received: ");
    Serial.println(incoming);

    if (incoming == 49){ // 1 in ASCII
      digitalWrite(LED, HIGH); // LED On
      BT.println("LED turned ON"); // Send the text via BT Serial
    }

    if (incoming == 48){ // 0 in ASCII
      digitalWrite(LED, LOW); // LED Off
      BT.println("LED turned OFF"); // Send the text via BT Serial
    }
  }
  delay(20);
}
The connection scheme that we will use for the LED will be the following:
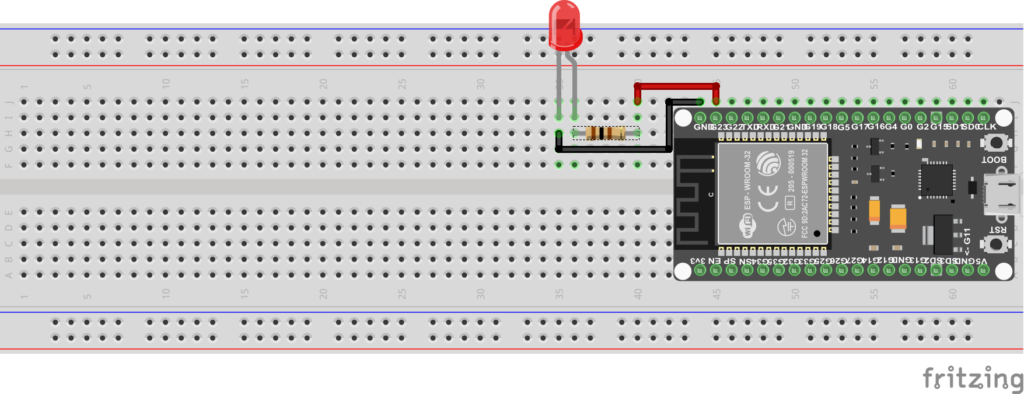
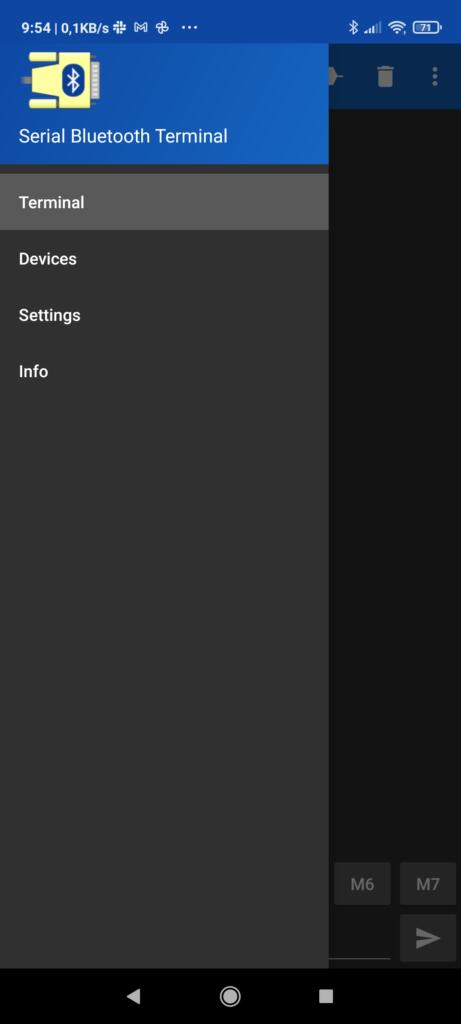
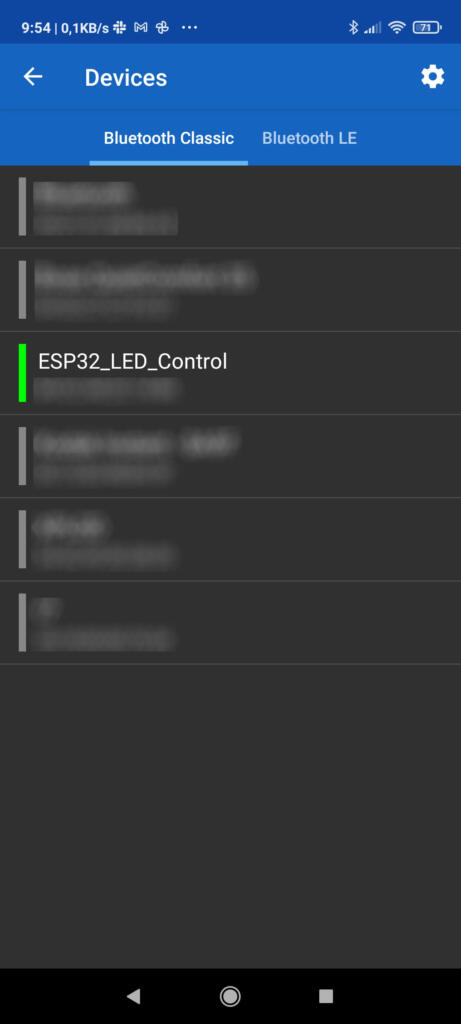
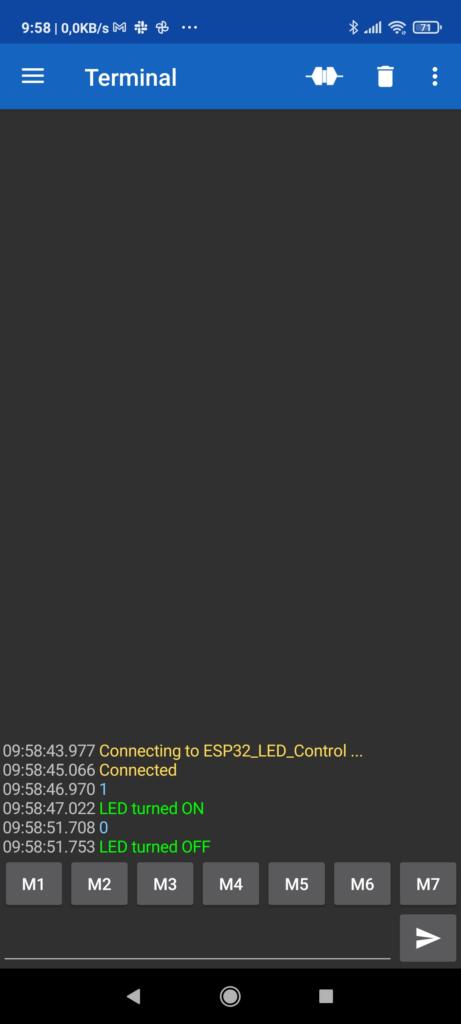
Now we will connect to the microcontroller using a Serial connection program via Bluetooth. I have used one called Serial Bluetooth terminal and it has worked correctly, but anyone can do it. We will connect to ESP32 by displaying the side menu and clicking on Devices, where we will select the device that is called as indicated above (ESP32_LED_Control). Once connected, simply sending 1 through the mobile to the ESP32 the led will turn on, and sending 0 it will turn off.
As you can see, it is very easy, and with this we can send and receive data through bluetooth.
Client mode (Serial)
Now that we have learned how to configure the ESP32 in Serial Bluetooth mode in order to send and receive data, we will learn how to connect it as a client. To do this, we will use the same code that we used in the previous section on ESP32, which will act as a server.
/*
  Program to control LED (ON/OFF) from ESP32 using Serial Bluetooth
  by Daniel Carrasco -> https://www.electrosoftcloud.com/
*/
#include "BluetoothSerial.h" // We will include the Serial Bluetooth header

#if !defined(CONFIG_BT_ENABLED) || !defined(CONFIG_BLUEDROID_ENABLED)
#error Bluetooth is not enabled! Please run `make menuconfig` to and enable it
#endif

#define LED 23
BluetoothSerial BT; // Bluetooth Object

void setup() {
  Serial.begin(9600); // Initializing serial connection for debugging
  BT.begin("ESP32_LED_Control"); // Name of your Bluetooth Device and in slave mode
  Serial.println("Bluetooth Device is Ready to Pair");

  pinMode (LED, OUTPUT); // Change the LED pin to OUTPUT
}

void loop() {
  if (BT.available()) // Check if we receive anything from Bluetooth
  {
    int incoming = BT.read(); // Read what we recevive
    Serial.print("Received: ");
    Serial.println(incoming);

    if (incoming == 49){ // 1 in ASCII
      digitalWrite(LED, HIGH); // LED On
      BT.println("LED turned ON"); // Send the text via BT Serial
    }

    if (incoming == 48){ // 0 in ASCII
      digitalWrite(LED, LOW); // LED Off
      BT.println("LED turned OFF"); // Send the text via BT Serial
    }
  }
  delay(20);
}
It is very important that we make sure that the BT.begin function initializes the bluetooth as a slave or it will not work (default mode). Once the ESP32 that will receive the connections has been configured, it is time to configure the client to connect and send the orders to turn the led on and off. for this purpose we will use the following code:
/*
  Program to control LED (ON/OFF) from ESP32 using Serial Bluetooth
  by Daniel Carrasco -> https://www.electrosoftcloud.com/
*/
#include "BluetoothSerial.h" // We will include the Serial Bluetooth header

#if !defined(CONFIG_BT_ENABLED) || !defined(CONFIG_BLUEDROID_ENABLED)
#error Bluetooth is not enabled! Please run `make menuconfig` to and enable it
#endif

BluetoothSerial BT; // Bluetooth Object
String clientName = "ESP32_LED_Control";
bool connected;

void setup() {
  Serial.begin(9600); // Initializing serial connection for debugging
  BT.begin("ESP32_client", true); // Name of your Bluetooth Device and in master mode
  Serial.println("Bluetooth Device is in master mode. Connecting to the host...");

  connected = BT.connect(clientName);
  if(connected) {
    Serial.println("Connected Succesfully!");
  } else {
    while(!BT.connected(10000)) {
      Serial.println("Failed to connect. Make sure remote device is available and in range, then restart app.");
    }
  }
}

void loop() {
  delay(500);
  BT.write(49); // Send 1 in ASCII
  delay(500);
  BT.write(48); // Send 0 in ASCII
}
We will notice that to start bluetooth in Master mode we have added the option when executing begin. This is very important, because otherwise you will not be able to connect. For this to work it is necessary that you turn on the ESP32 that acts as a Host first so that bluetooth is discoverable, and then turn on the one that will act as a client so that it connects and begins to send the data through the serial port.
Callback function
One last thing we need to know is the callback function. For those who do not know what this function is, I will tell you that it is simply a function that will be executed when there is a bluetooth event. For example, when a client connects, disconnects, receives and sends data … The complete list of events that trigger this function is as follows:
- ESP_SPP_INIT_EVT: When SPP mode is initialized
- ESP_SPP_UNINIT_EVT: When the SPP mode is deinitialized
- ESP_SPP_DISCOVERY_COMP_EVT: When service discovery is complete
- ESP_SPP_OPEN_EVT: When an SPP client opens a connection
- ESP_SPP_CLOSE_EVT: When an SPP connection is closed
- ESP_SPP_START_EVT: When the SPP server is initialized
- ESP_SPP_CL_INIT_EVT: When an SPP client initializes a connection
- ESP_SPP_DATA_IND_EVT: When receiving data through an SPP connection
- ESP_SPP_CONG_EVT: When congestion status changes on an SPP connection
- ESP_SPP_WRITE_EVT: When sending data through SPP.
- ESP_SPP_SRV_OPEN_EVT: When a client connects to the SPP server
- ESP_SPP_SRV_STOP_EVT: When the SPP server stops
As you can see, we have a good number of events available. These can be quite useful, because for example, you can detect if the client has disconnected and relaunch the connection, or detect when data is received instead of continually asking. For example, the Host example with which we control the LED can be replaced by the following:
/*
  Program to control LED (ON/OFF) from ESP32 using Serial Bluetooth
  by Daniel Carrasco -> https://www.electrosoftcloud.com/
*/
#include "BluetoothSerial.h"

#if !defined(CONFIG_BT_ENABLED) || !defined(CONFIG_BLUEDROID_ENABLED)
#error Bluetooth is not enabled! Please run `make menuconfig` to and enable it
#endif

#define LED 23
BluetoothSerial BT; // Bluetooth object

void callback_function(esp_spp_cb_event_t event, esp_spp_cb_param_t *param) {
  if (event == ESP_SPP_START_EVT) {
    Serial.println("Initialized SPP");
  }
  else if (event == ESP_SPP_SRV_OPEN_EVT ) {
    Serial.println("Client connected");
  }
  else if (event == ESP_SPP_CLOSE_EVT  ) {
    Serial.println("Client disconnected");
  }
  else if (event == ESP_SPP_DATA_IND_EVT ) {
    Serial.println("Data received");
    while (BT.available()) { // As long as there is data to receive
      int incoming = BT.read(); // Read a byte of the received data
      Serial.print("Received: ");
      Serial.println(incoming);

      if (incoming == 49) { // 1 in ASCII
        digitalWrite(LED, HIGH); // Turn on the LED
        BT.println("LED turned ON"); // Sends the text through the Serial port of the BT
      }
      else if (incoming == 48) { // 0 in ASCII
        digitalWrite(LED, LOW); // Turn off the LED
        BT.println("LED turned OFF"); // Sends the text through the Serial port of the BT
      }
    }
  }
}

void setup() {
  Serial.begin(115200); // Initializing the serial connection for debugging
  BT.begin("ESP32_LED_Control"); // Name of your Bluetooth Device and in slave mode
  Serial.println("Bluetooth device is ready to pair");

  BT.register_callback(callback_function); // We register the "callback_function" function as a callback function.

  pinMode (LED, OUTPUT); // Change the PIN of the led to OUTPUT
}

void loop() {
}
As you can see, we have released the main loop and it no longer has to be asking all the time if there is data, but the program itself launches the function that we have indicated every time there is an event, and we act accordingly. This will make our program cleaner and better optimized.
I hope it helps you and do not hesitate to comment on anything. Greetings!.

