
Today I bring you a guide on how to make a two-way I2C communication between Arduino. I have recently started tinkering with this protocol because I am interested in a project that I have in mind, and after a few tests I have been able to verify that two Arduino masters can communicate without problems.
Previous considerations
Although it is possible to communicate between several Arduino, a series of considerations must be taken before proceeding to avoid problems:
- i2C is a communication protocol of the OAAT (One At A Time) type, which means that only one master can send data at a time.
- If you make a lot of noise by sending continuous data, you may interfere with the correct operation of the Arduino. If, for example, you send a data in a loop of an Arduino without delay, you will spam the other and prevent it from executing the main thread, stopping its programming.
- Every time you receive data on the slave it goes out of the main loop, so it is important not to load the reception function too much, since it will delay the execution of the main code.
- The more Masters sending, the more complex it is to manage the i2C Bus.
My intention, for example, is to create an automatic Slave registry in which when one enters the group and turns on, it connects as a Master and asks the General Master for an ID, and when he receives it he becomes a Slave with that ID. This would not cause much burden on the General Master, and basically the rest would be Slaves. I will put the code later when it achieves my purpose, which also includes persistence in the ID received after the shutdown.
What differentiates a Master from a Slave
The main and only difference between a Master and a Slave is that the Master has no ID, while the Slave has a unique ID on the bus.
The moment an ID is put to a Master, it acquires the ability to receive data as if it were a Slave. It is for this reason that simply by giving an ID to the Masters, you can communicate bi-directionally with each other.
How bidirectional communication is achieved
Bidirectional communication is achieved by turning the two Arduinos into Slaves. To do this you have to assign an ID to each one and put a function that is launched when they receive data. By doing both Slaves you put them on listen to receive data, but by not losing the ability to send, they can send data to the other Slave of alternate form
Code and Connection
The connection itself has no mystery, since it uses the same i2C connection:

And in reference to the code, it is the same and only changes the ID of the Arduino in i2C.
I will put them separately to be able to put different texts, but you will notice that it does not change (I really change x for y).
#include <Wire.h>

void setup()
{
  // Los master pueden obviar este ID, pero al querer recibir datos, tendremos que ponerlo
  Wire.begin(0); // Se une al bus i2C con la ID #0
  Wire.onReceive(receiveEvent); // Función a ejecutar al recibir datos
  Serial.begin(9600);
}

byte x = 0;

void loop()
{
  Wire.beginTransmission(1); // Send to Slave #1
  Wire.write("x is ");       // Send five bytes
  Wire.write(x);             // Send one byte
  Wire.endTransmission();    // Stop sending

  x++;
  delay(500);
}

// Esta función se ejecutará al recibir datos, lo cual provocará que se salga del loop principal.
void receiveEvent(int howMany)
{
  while(1 < Wire.available()) // hacemos loop por todos los bytes salvo el último
  {
    char c = Wire.read();    // recibe un byte como carácter
    Serial.print(c);         // imprime el carácter
  }
  int x = Wire.read();       // recibe el último byte como número
  Serial.println(x);         // imprime el número
}
#include <Wire.h>

void setup()
{
  // Los master pueden obviar este ID, pero al querer recibir datos, tendremos que ponerlo
  Wire.begin(1); // Se une al bus i2C con la ID #1
  Wire.onReceive(receiveEvent); // Función a ejecutar al recibir datos
  Serial.begin(9600);
}

byte y = 0;

void loop()
{
  Wire.beginTransmission(0); // enviar a Slave #0
  Wire.write("y is ");       // envía cinco bytes
  Wire.write(y);             // envía un byte
  Wire.endTransmission();    // deja de enviar

  y++;
  delay(500);
}

// Esta función se ejecutará al recibir datos, lo cual provocará que se salga del loop principal.
void receiveEvent(int howMany)
{
  while(1 < Wire.available()) // hacemos loop por todos los bytes salvo el último
  {
    char c = Wire.read();    // recibe un byte como carácter
    Serial.print(c);         // imprime el carácter
  }
  int y = Wire.read();       // recibe el último byte como número
  Serial.println(y);         // imprime el número
}
With these examples we can already communicate between the two Arduinos in a bidirectional way:
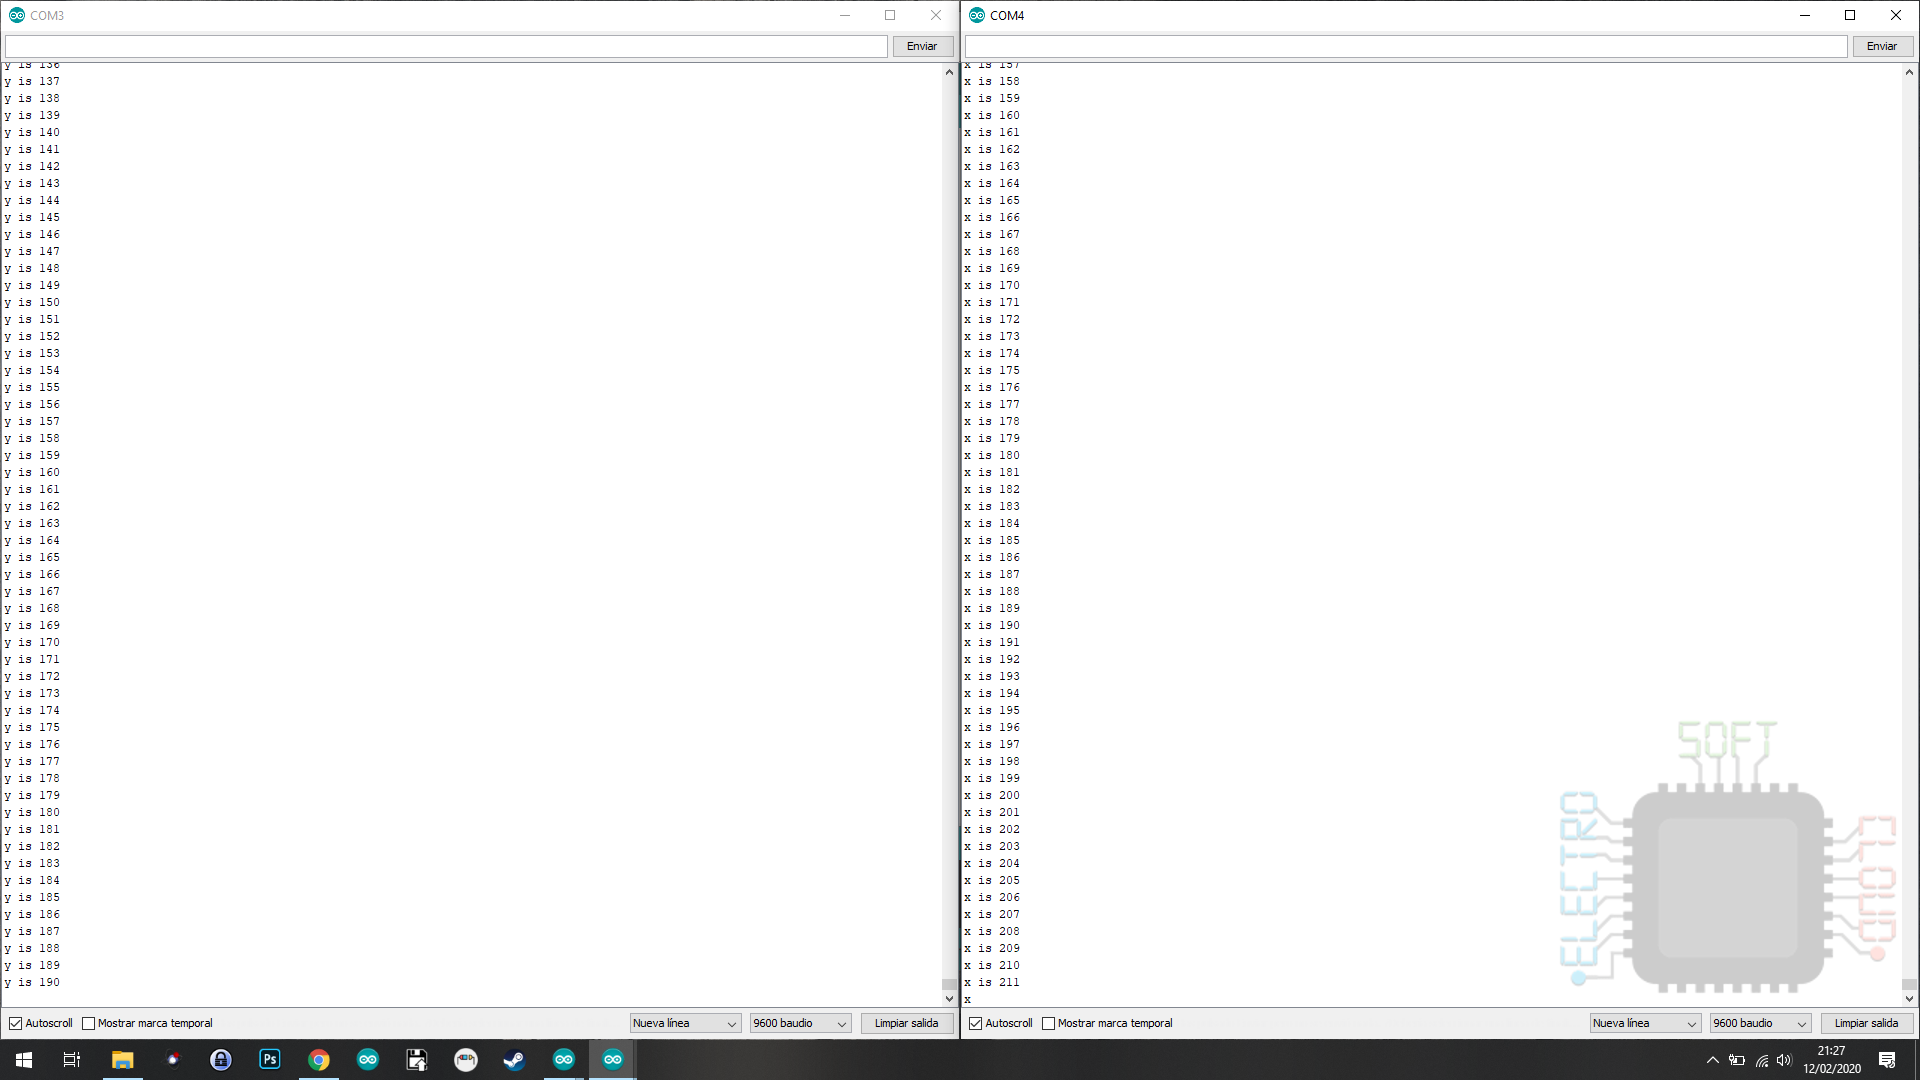
Up to here the guide of how to make an I2C communication between two Arduino, in a bidirectional way. I hope you have a server and as always, comments and suggestions are accepted.
Greetings!
I have not test it, but in theory yes, you can.
does that mean that i could, in theory, connect more arduino together and give them each a unique id?