
Hello, today I bring you a basic tutorial on how to use a raspberry pi pico together with MicroPython, which will delight hobbyists. Mainly because it far exceeds the widely used ATMega328p in several respects. The technical differences between the two are as follows:
| Raspberry Pi Pico | ATMega328p | |
| Cores | 2 | 1 |
| Architecture | 32 bits ARM | 8 Bits RISC |
| CPU | de 48 a 133 Mhz | 16Mhz |
| RAM | 256Kb | 2Kb |
| Flash | 2Mb | 32Kb |
| EEPROM | No | 1Kb |
| Programming languages | MicroPython, C, C++ | C (Arduino IDE) |
| USB voltage | 5v | 5v |
| Alternative voltage | 2-5v in VSYS Pin | 7-12v through an alternative connector |
| MCU voltage | 3.3v | 5v |
| GPIO voltage | 3.3v | 5v |
| USB interface | Device and USB Host 1.1 | External IC Serial programming |
| GPIO | 26 Digital Inputs/Outputs (Total) | 20 Digital Inputs/Outputs (Total) |
| ADC | 3 x 12bits | 6 x 10bits |
| UART | 2 | 1 Shared with Serial programmer |
| I2C | 2 | 1 |
| SPI | 2 | 1 |
| PWM | 16 | 6 |
| Internal Led | 1 programable in pin GP25 | 1 programable in pin D13 |
As you can see except for small aspects, the Raspberry Pi Pico microcontroller wins by a landslide.
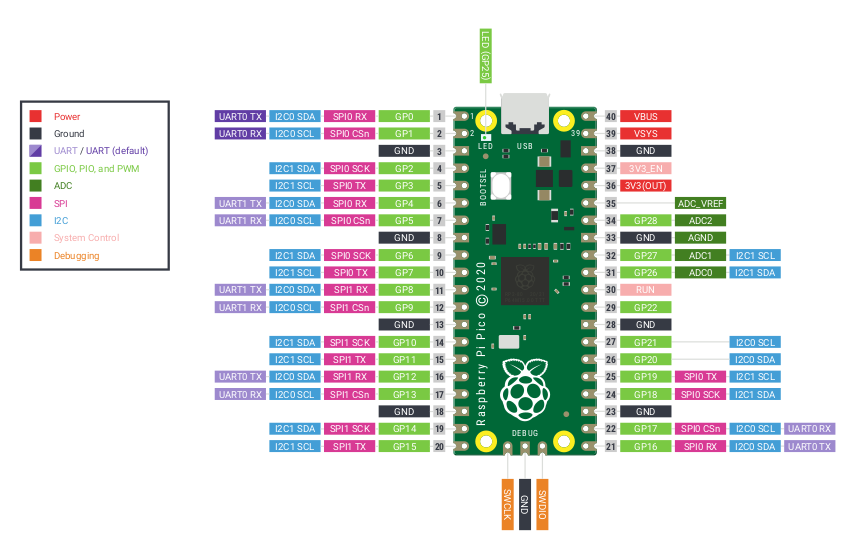
Pinout
The first thing we have to know is the pinout of the microcontroller, which will help us to program it and know where we are connecting the peripherals:
First of all
The microcontroller itself is very easy to prepare. The first thing you have to do is connect it to the computer by pressing and holding the button it includes.

This will make the microcontroller connect in mass storage mode, so a drive similar to that of a pendrive will appear with two files. We can open the index.htm file which will redirect us to the first steps website, which we can also access with the following link.
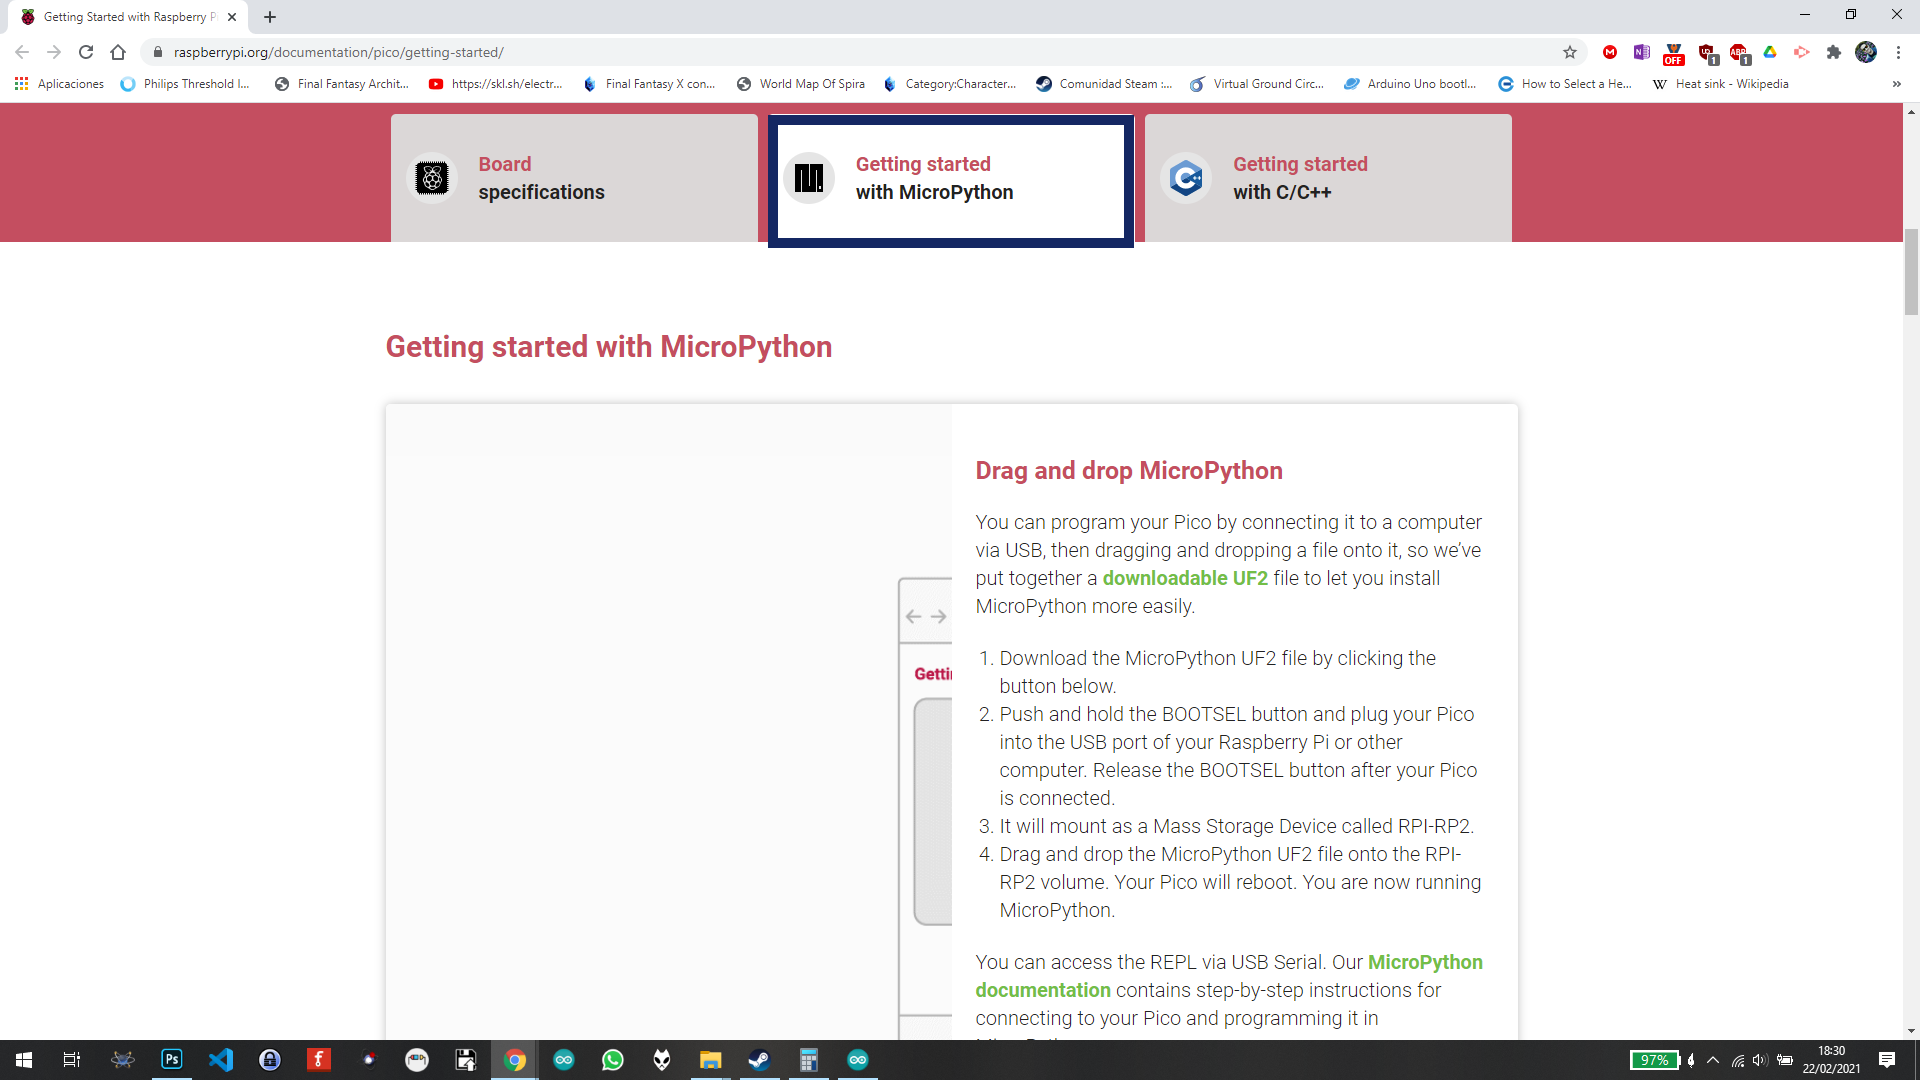
On this page, we will navigate a little further until we see three tabs of card information, and how to get started with MicroPython and C ++. There we will select the MicroPython tab and it will tell us to download a UF2 file.
We will navigate a little down and click on the button “Download UF2 File”
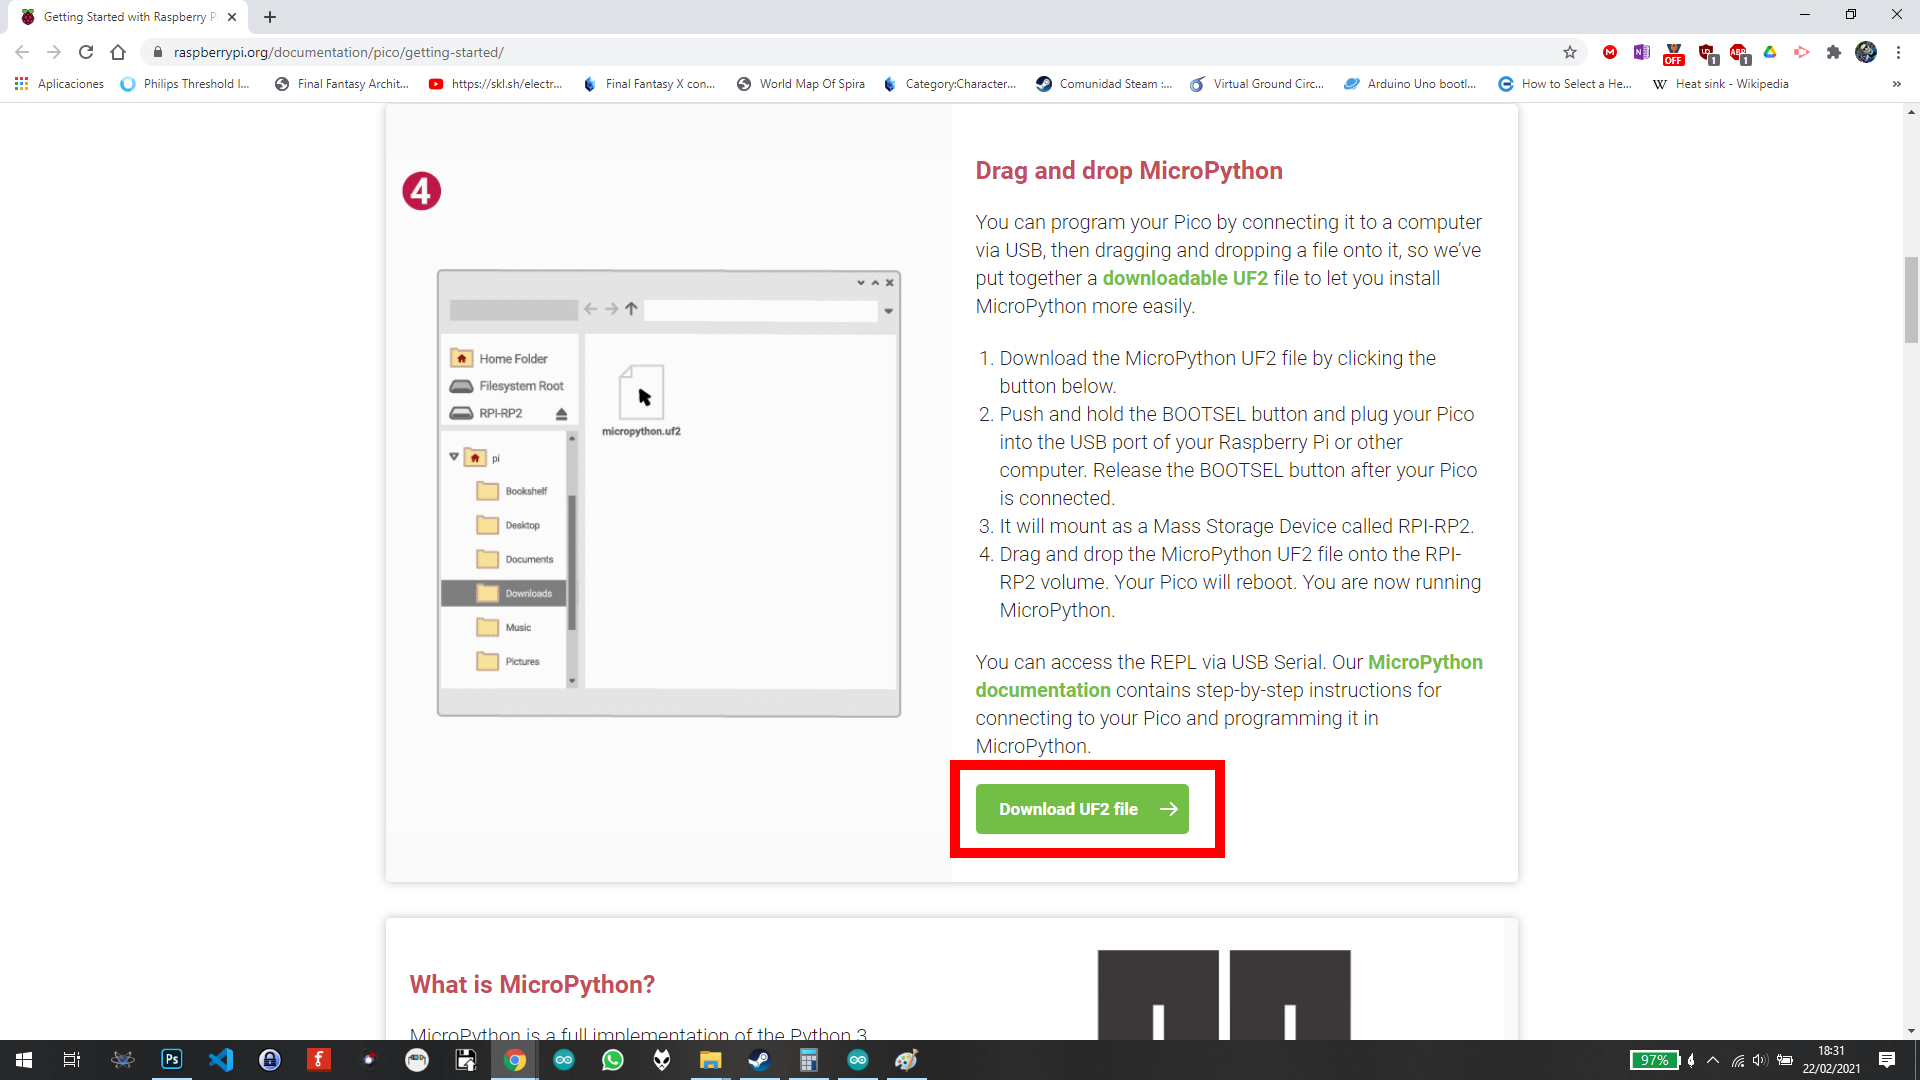
Once downloaded, we will simply copy it to the new drive that was created earlier when connecting the Raspberry Pi Pico. Once copied, the microcontroller will reboot and connect in a different mode, ready for programming.
Thonny installation
The next thing we have to do is install the IDE to program our microcontroller. For this we have a program called Thonny, which we can download from the following link:
We will proceed to download and install it, and once we have it installed we simply open it. It will ask us the language, which we will set to our liking (I have chosen English), and then in Initial Settings we will select Standard (otherwise it will not give us the advanced options).
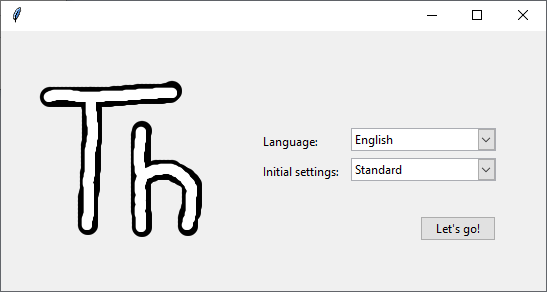
We give Let’s go!, and the main screen of the program will open. Once is open, we will go to Tools -> Options.

And a new window will open with the program options. We will navigate to the Interpreter tab, and there we will select Rasberry Pi Pico in the first drop-down, and the second we will leave it in Try to detect port automatically.
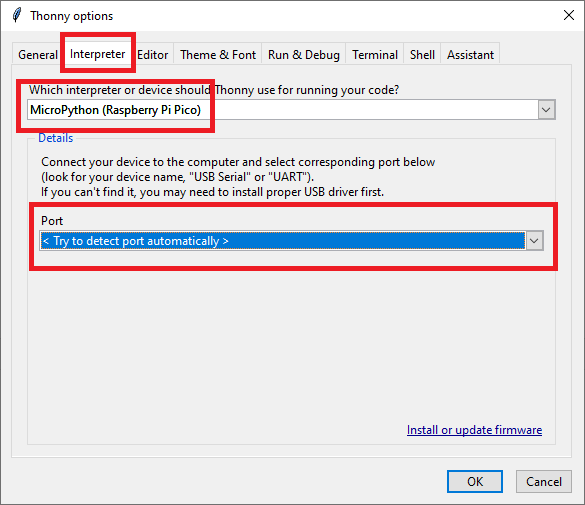
We will give OK and we will have the program ready to use it with our Raspberri Pi Pico. To connect the microcontroller we will simply connect it without pressing the button.
Thonny Basic Operation
Once we’ve started the program, we can start messing with our microcontroller. One of the advantages is that you can execute commands directly in the microcontroller without uploading the code, which is very useful for testing.
The main screen of the program is as follows:
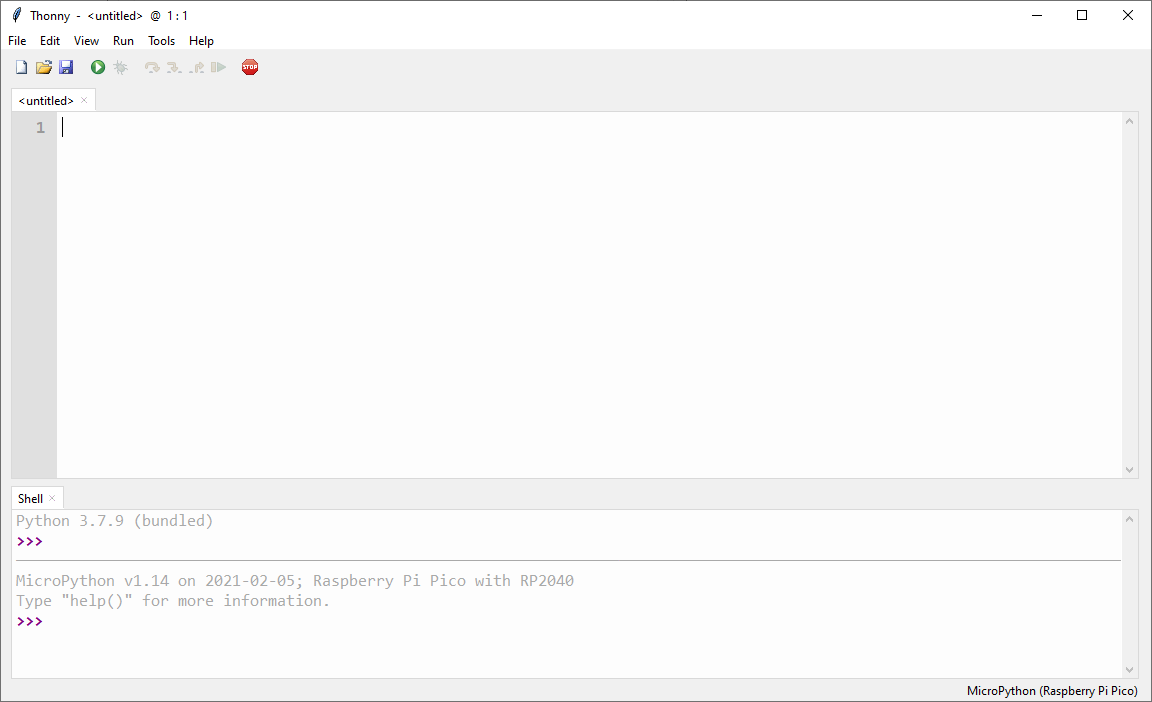
We can distinguish three zones in the program:
- Menus and shortcut buttons at the top
- Programming window in the central part
- Console at the bottom
In the part of the menus we can distinguish some direct access buttons, which are from left to right:
- New File
- Open File
- Save
- Execute
- 5 buttons to debug
- Lastly the stop button that will stop the code execution
Unlike Arduino, we can execute the code directly without uploading it to the microcontroller, so we can load a file with the second button, and then press the Execute button to launch it. Obviously this execution is volatile and will not persist in the microcontroller after restarting it.
The central part of the program is where we will program the code that we want to execute in the Microcontroller (or upload it), and finally we have the lower area, which is a direct console with the microcontroller. This console allows us to execute the commands live. For example, if we run these two lines on that console, we will turn on the led on the board:
from machine import Pin
Pin(25, Pin.OUT).high()
Program the microcontroller
Above you saw that simply by pressing the Execute button, the program was executed in the microcontroller without the need to program it, but what happens when we want the program to be permanent. Don’t worry, the process is as easy as saving…
The first thing we will do is create a new file, and we will paste this example code:
import time
from machine import Pin
print("Welcome to Pico example 2, blinking an LED")
led = Pin(25, Pin.OUT)
# For demo purposes, we have an infinite loop here
while True:
    led.high()
    time.sleep(0.5)
    led.low()
    time.sleep(0.5)
We will click on the save button and the program will ask us if we want to do it on our computer, or on the microcontroller.
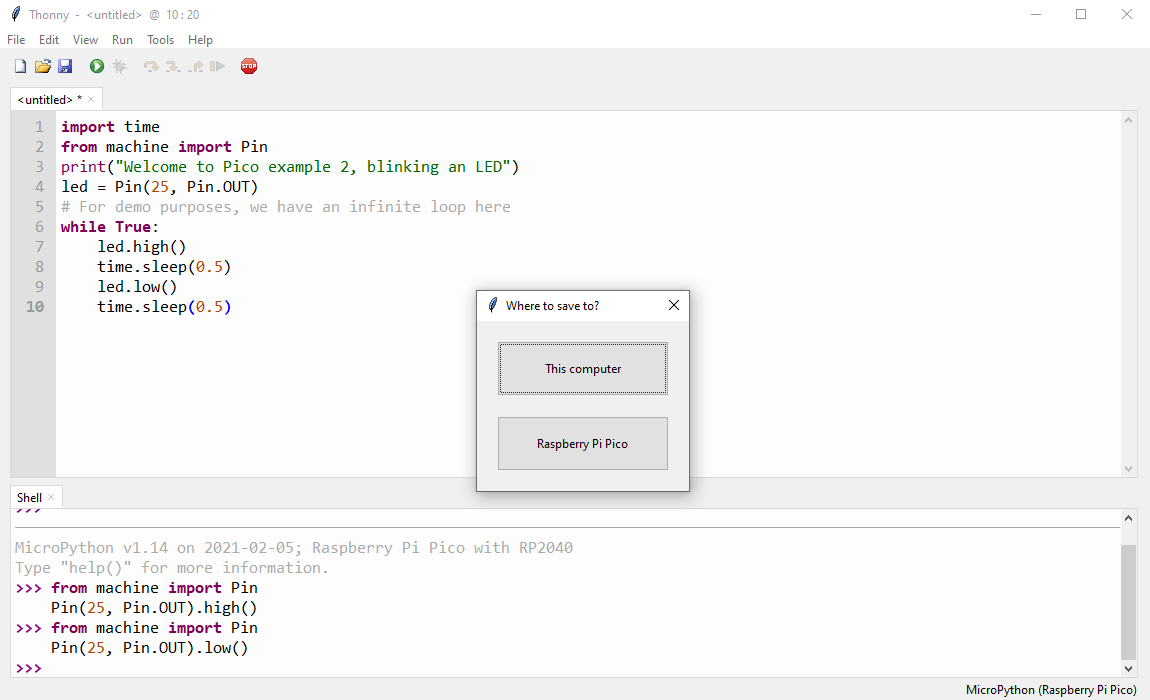
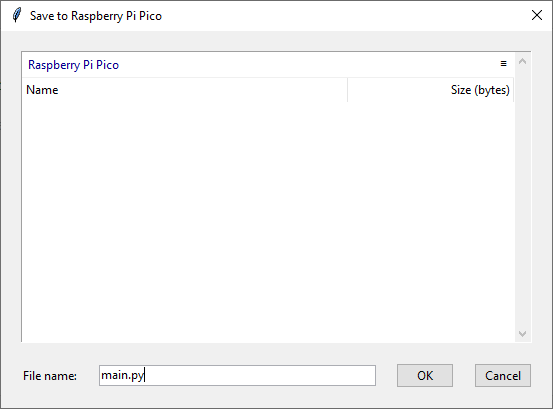
We will select Rasberry Pi Pico and a window will appear where we can indicate the name of the file. It is very important that it is called main.py or the microcontroller will not load it, since it is the name it looks for by default.
We disconnect the microcontroller and reconnect it, and it will begin its execution.
To reprogram the microcontroller we will need to press the Stop button to stop the execution of the current program, which will make the microcontroller available again.
Important: The save button will always save in the last file that we have saved, so if we save the file in the microcontroller, we modify it and we give it to save, it will be saved in the microcontroller without going through our PC. If we want to have a copy on our PC, we will have to click File -> Save As and select where we want to save it.
I hope you liked it and that it helps you get started in the world of MicroPython and Raspberry Pi Pico. Later I will try to make one to program it using C ++, which tends to be more optimized and faster, so it will be very useful.
Greetings and do not hesitate to write a comment or subscribe to my website.