Hello,
This time what I bring you is nothing more than a mini tutorial, about how to install Arduino libraries in the IDE. This manual is mainly to avoid having to be indicating in each post that it is necessary to install a library, the necessary steps to do it. In this guide we will see the automatic way of installation, but we will also see the manual way in case the automatic installation is not available.
Install libraries automatically
Automatic installation is the easier and more comfortable of the two, since the Arduino IDE itself will do all the work for us.
The first thing we will have to do is open the IDE and go to the library manager. For this we can use the key combination ctrl + shift + I, or we can access it through the menu Sketch > Include Library > Manage Libraries.
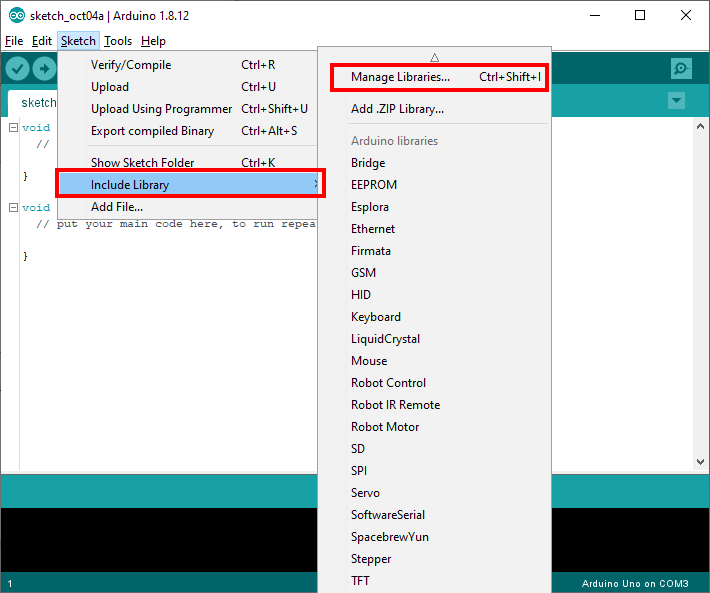
This will take us to a screen, where we can search for the library that we are interested in installing.
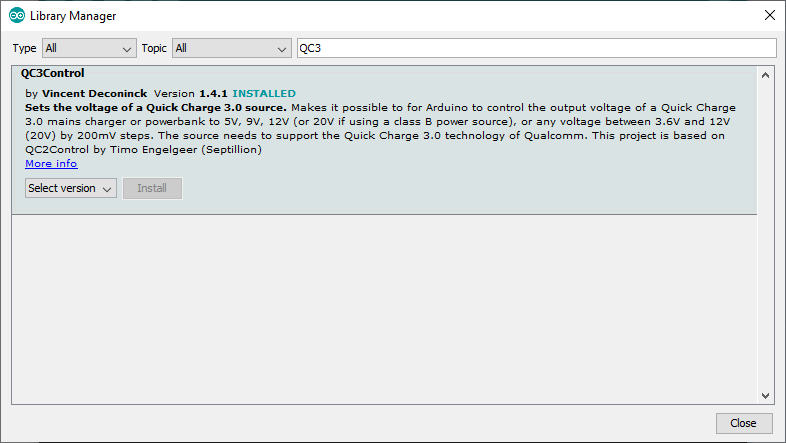
Once the version is selected, we will simply press the install button and it will be ready. Of course, by default the last selected version will always come, but it may be that we want to install an older version.
Como puedes observar, la instalación automática de una librería es de lo más fácil que hay 😉
Manual installation
Everyone at some point have found the need to install an Arduino library manually. For example, a while ago a developer added a new feature that interested me. This functionality was in testing, so it was not available automatically and I had to perform a manual installation. You can also find cases in which the library exists on GitHub or similar, but is not added to the IDE’s library manager list.
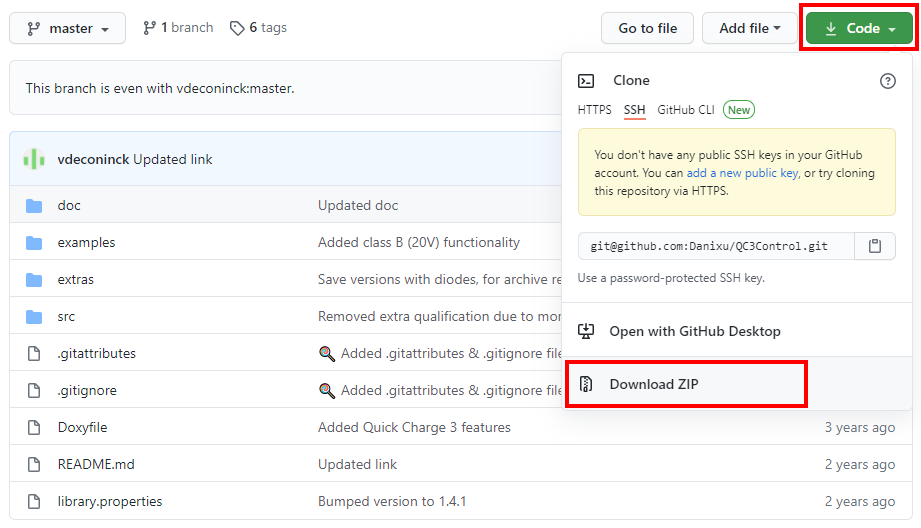
The first thing we have to do is get the library that we want to install. As a rule, it usually comes in a compressed file, and on some pages, such as GitHub, we have the option of downloading the source code as zip.
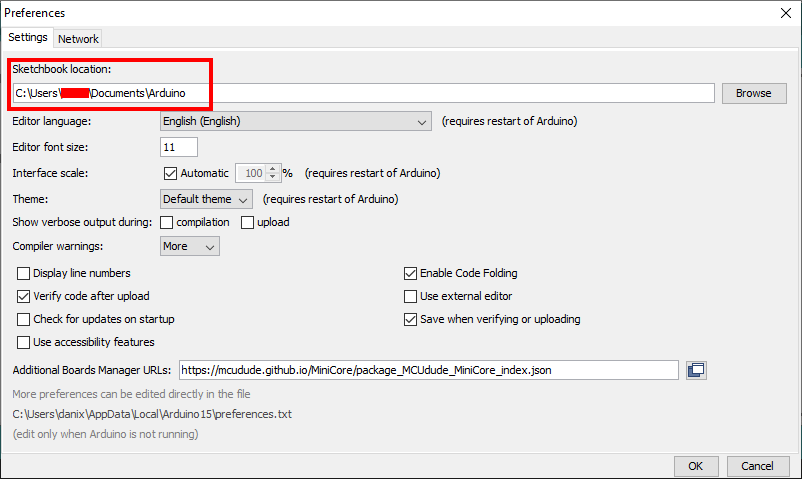
Once we have the library, what to do is enter the folder where the libraries are. For example, this folder is usually in My Documents > Arduino > libraries. We can verify this by opening the program preferences, in File > Preferences.
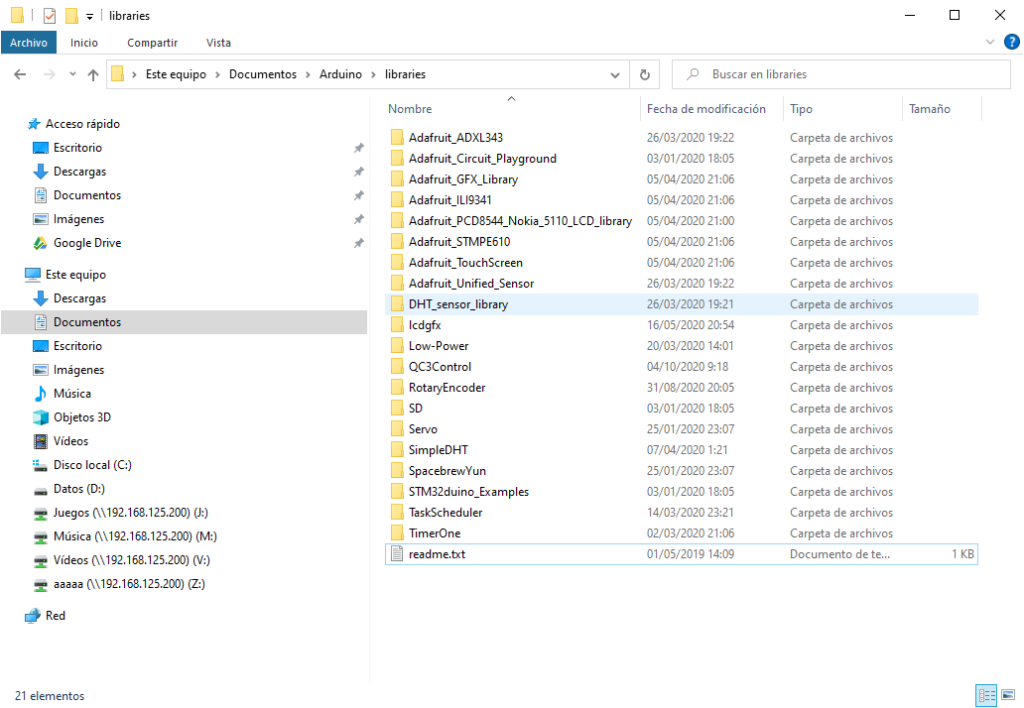
Once inside the folder, all we have to do is create a folder with the name of the library, which is important not to have spaces, or special characters (it is recommended to use alphanumeric characters and hyphens). Once the folder is created, we will copy all the contents of the zip into it.
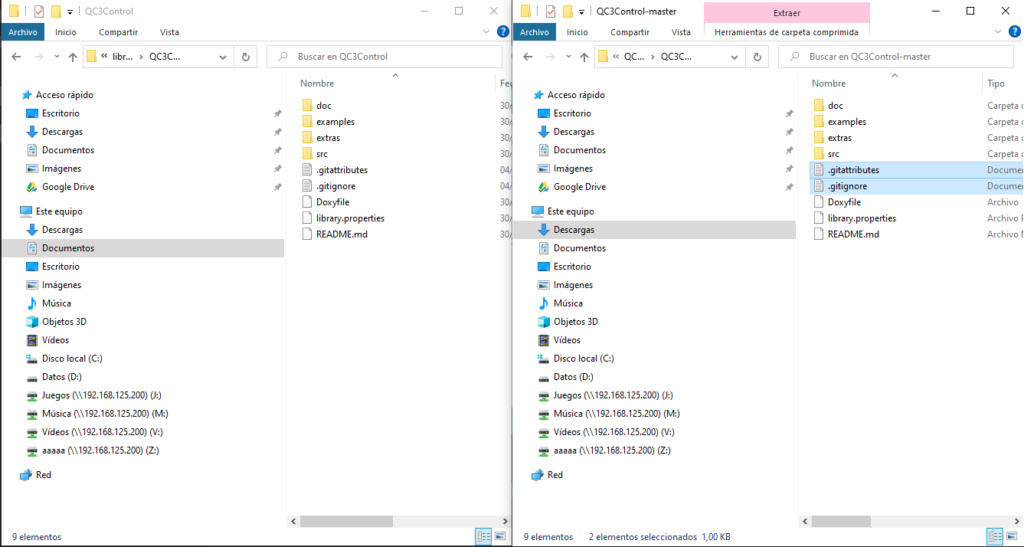
It is important to copy individual files, otherwise the IDE will not be able to find the library.
NOTE: After manual installation of a library, it is necessary to restart the IDE to detect it.
Semi-automatic installation
In addition to the automatic and manual forms, there is a third option to install Arduino libraries. It is a semi-automatic method, which is based on the manual download of the library, and the installation through an IDE option.
The first thing we have to do obviously is download the library as we did in the first step of the manual method. Once we have the zip, what we will do is click on the option Install ZIP library that is in Sketch > Include Library.
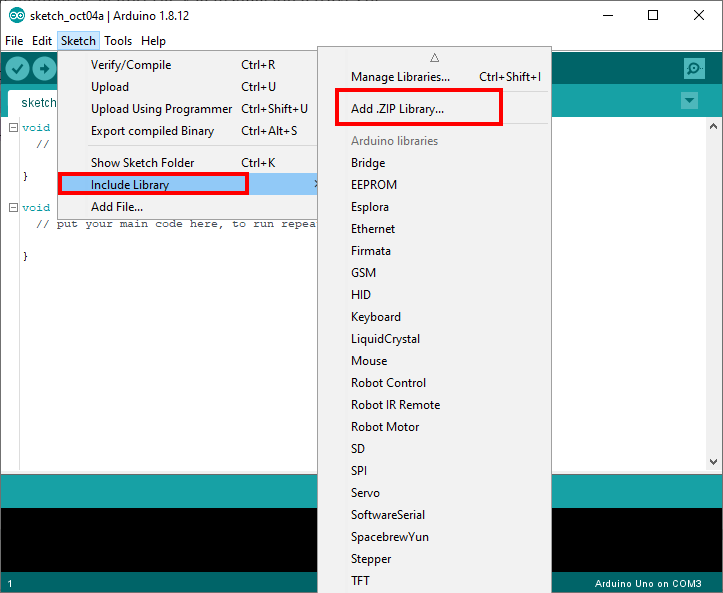
Then, we will select the ZIP that we just downloaded, and we will have it installed. This method may not work for all ZIP files.
More information: https://www.arduino.cc/en/Guide/Libraries
I hope you liked it and it will be useful for your projects. Happy programming! and greetings!
